Reflections

This project of refurbishing a old loom took much longer than I anticipated. I had estimated it would take a month, in fact it was more like three or four.  And I was lucky; although the loom was dirty and rusty, all the pieces were there (excepting a few nuts and bolts which were easily replaced) and all the parts were usable.  If I had needed to replace anything significant I’m not sure how I would have gone about doing that.

By far the most time consuming part of the process was getting rid of rust. I learned more about removing rust than I knew there was to know.  Thank goodness for Google! I tried white vinegar and steel wool, Coke and steel wool, naval jelly and steel wool, WD40 and steel wool, and finally electrolysis.  For pieces that were not attached to wood or other non-metal pieces the electrolysis was much faster, easier, and cleaner.  For pieces bolted to wood WD40 and steel wool worked best.  Once the major work of removing rust was done, a quick scrubbing with aluminum foil often helped bring a shine to the metal.

I wasn’t able to salvage all of the rusted metal.  Although I was able to clean much of the rust off of the reeds with a combination of electrolysis and scrubbing, I was not able to get all the rust (even after several tries), and I could see and feel that the clean dents had been roughened by the rust. I decided it was best to discard them rather than risk broken threads while weaving.

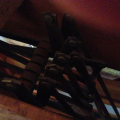
I’ve been using the loom regularly since I put it together, and it works pretty well.  Early on I noticed a tendency for the metal treadle hooks which tie the treadles to the lamms to tangle with each other causing some shafts to rise when they weren’t wanted.  These metal pieces are thin rods with a hook at one end that hooks onto an eyebolt on the lamm. The end of the rod opposite from the hook is bent at a right angle so the end can catch under the treadle. The right angle bend on some rods protrudes to the left side of the hook, on others to the right side. I realized that it is best to alternate the direction of the right angle bend on a treadle, especially when that treadle is tied up to several lamms, to prevent tangling.

IMG_0538

Treadle hooks tying the treadles to the lamms.


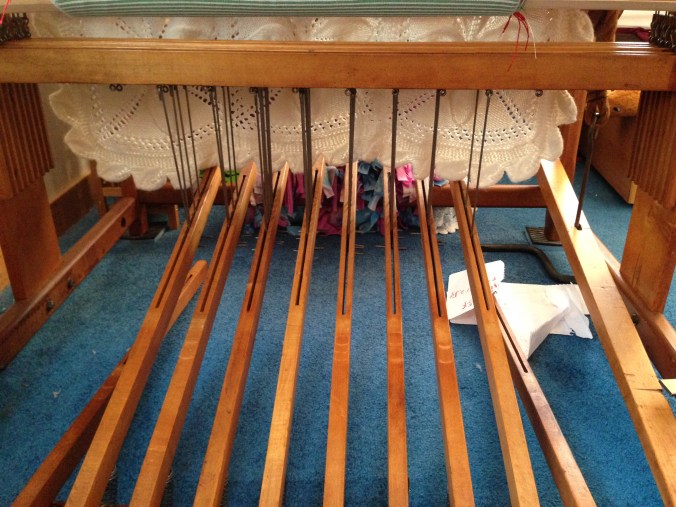
There is one issue that I still haven’t resolved. The warp beam brake is a rope that passes around a drum on the end of the beam.  The rope is attached to the frame of the loom on one end, and to a long eyebolt at the other. The eyebolt gets inserted into a brake release handle and fastened with a washer and a nut.  The threads on the bolt are long enough to allow the brake to be adjusted by tightening or loosening the nut.  I adjusted this brake when I started my first project so it was tight and held the warp in place while I was weaving, but as I wove along it began to loosen and slip.  I re-adjusted it and it held for a while and began to slip again. I repeated this process until the nut reached the top of the threads on the bolt. When the warp started to slip after that point I didn’t know what to do.  I consulted with my husband (who has been very patient about staying out of the repair process until I ask for help), and he suggested adding a bunch of washers between the nut and the handle to effectively extend the length of the threads. That’s working for now. I suspect that the 70 year old rope may need to be replaced, but I find the idea of replacing it intimidating so I am putting it off as long as I can.

warp brake

Washers extending the ability to tighten the brake

In the Meantime…

While musing on the beauties of my looms I have been continuing to make progress on cleaning up the Binder loom. I got the rust off of all the treadles (they each only have a small metal spike on them that seems to be there to help align the treadle with the springs that go under them). In addition, there are a couple metal plates attached to wood pieces (I think one is a hand brake, I’m not sure yet what the other one is for), and those are now clean. Most of the metal-attached-to-wood that is left is nuts and bolts on pieces that are still connected to each other.

The weather has been beautiful this week, so I thought I should start doing some of the metal that’s not attached to anything. The first step was to take the jack mechanism out of the castle, as the jacks are metal and not really accessible in the castle (the castle is the tall center part of the loom). That was easier than I expected. The mechanism is held in by two long bolts which came undone without any trouble. Since I was poking around I also took a look at the piece where the treadles attach to see how they fit on it. This had been a bit of a mystery to me, and I was concerned about it. The previous owner of the loom had made detailed diagrams of how to put it together when she dismantled it, but there is no diagram regarding the treadles. That may be because it’s pretty self-evident. I am no longer concerned about that part. I removed a few screws to detach a metal rod that the treadles thread onto so it could be cleaned.

A close up of part of the jack mechanism as it sits in the castle.

A close up of part of the jack mechanism as it sits in the castle.

There are 16 metal bars that fit in the harnesses (on on the top and one on the bottom of each harness) that the heddles will be suspended between. I started cleaning rust off of these using Loctite Rust Dissolver (formerly Naval Jelly). The directions say to paint on the rust dissolver, let it sit for 5-10 minutes, rinse it off, and voila! Of course it is not that easy. The bars looked better after one coat, but still rusty. My next step was to paint on a second coat of the rust dissolver and scrub with a metal bristle brush. That worked like a charm, but it takes about half an hour per bar. I was hoping to get them all done this week, but so far I have only been able to do 9. I expect to have to use the same procedure on the 8 jacks as well, and on various other small parts (the rods that tie up the treadles and nuts, bolts and screws that will be used to put the loom back together). I babysit my grandchildren 2 ½ weekdays most weeks (they were away this week), and I don’t want to be using the rust dissolver while they are around, so it may be tricky to find the time to finish the jacks. We’ll see.

The rusted bars that hold the heddles in the harnesses.

The rusted bars that hold the heddles in the harnesses.

Four of the bars that hold the heddles all cleaned up and shiny!

Four of the bars that hold the heddles all cleaned up and shiny!

I’ve finished cleaning all the heddles that were in a shoebox (775 of them) and moved on to the heddles that had been left on the loom. At this point I have done 1,000 heddles. I’m estimating that there are a total of 1600 there. Most of the heddles are cleaning up well, but there are some that were extensively rusted and may not be useable. I will re-evaluate when I start putting them back on the loom to make sure there aren’t any rough spots that will abrade the threads during weaving. I’m curious about why some heddles (and other metal pieces) have more rust than others that were in the same situation. The heddles on the loom in general are more rusted than those in the shoebox, I assume because they had more exposure to the damp air. But why are some that were on the loom lightly rusted and others heavily rusted? Is it just position? Does the metal content vary? I doubt I’ll ever have an answer to that, but it’s something I think about while scrubbing away.